A certain type of camera straps has become popular recently. These straps are worn diagonally over your chest and allow the camera to slide freely on the strap. If you’re not shooting, the camera rests on your hip, doesn’t strain your neck and leaves both your hands free. If you need it, you can grab the camera quickly, without strangling yourself with the strap.
Two products are build after this principle: the R-Strap and the Sun Sniper. Both have two big disadvantages though.
First, they attach to the tripod mount of your camera using a special screw. The tripod mount is not build for stress like this! Having the camera dangle and bounce from a strap attached there might very well destroy it. Further, the screw can come loose if the camera twists around. Both products take measures against this, but a certain risk remains. Second, both straps are pretty expensive at around 50€
In this post I’ll give instructions on how to build such a strap by yourself with material for 12€. This strap not only works similarly to its 50€ brothers but is of very high quality as well and can be trusted with heavy equipment.
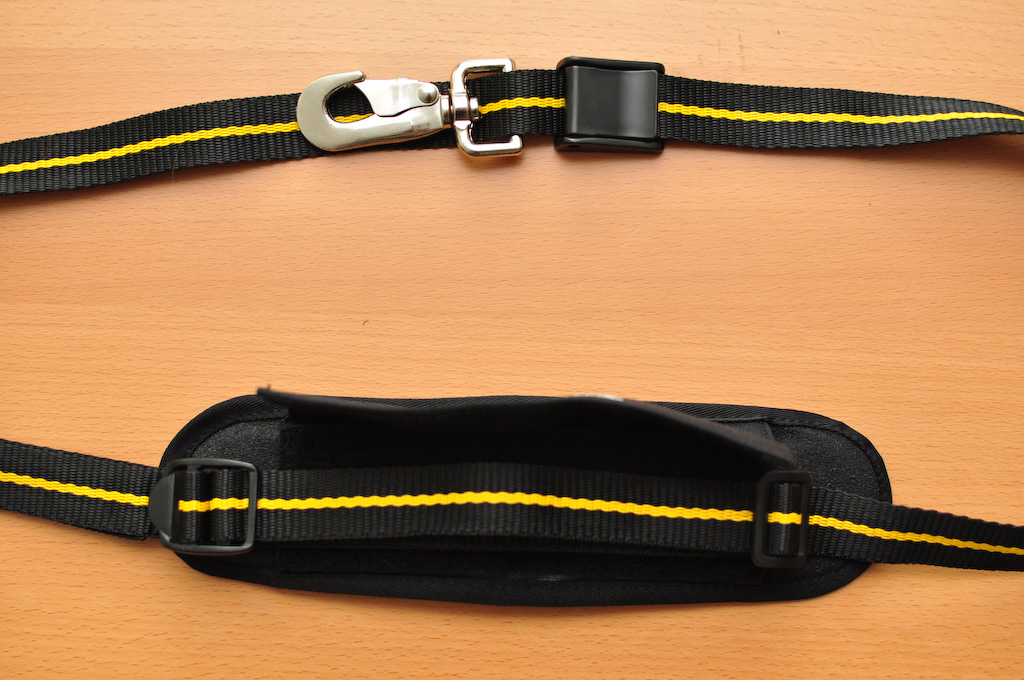
This is what my strap looks like (click the images to enlarge):
A list of the parts I used:
- Two carabiners stripped from a camera bag (the black plastic things sliding on the strap), free!
- A aluminum munkees carabiner from an outdoor store, 2€
- 20mm black strap from the same store, 1€ per meter
- Various plastic parts, like the fastener, the snap-lock and the two buckles, also from the store, 3€
- Tatonka shoulder pad, same store, 6€
- 2cm key ring, 50 cent
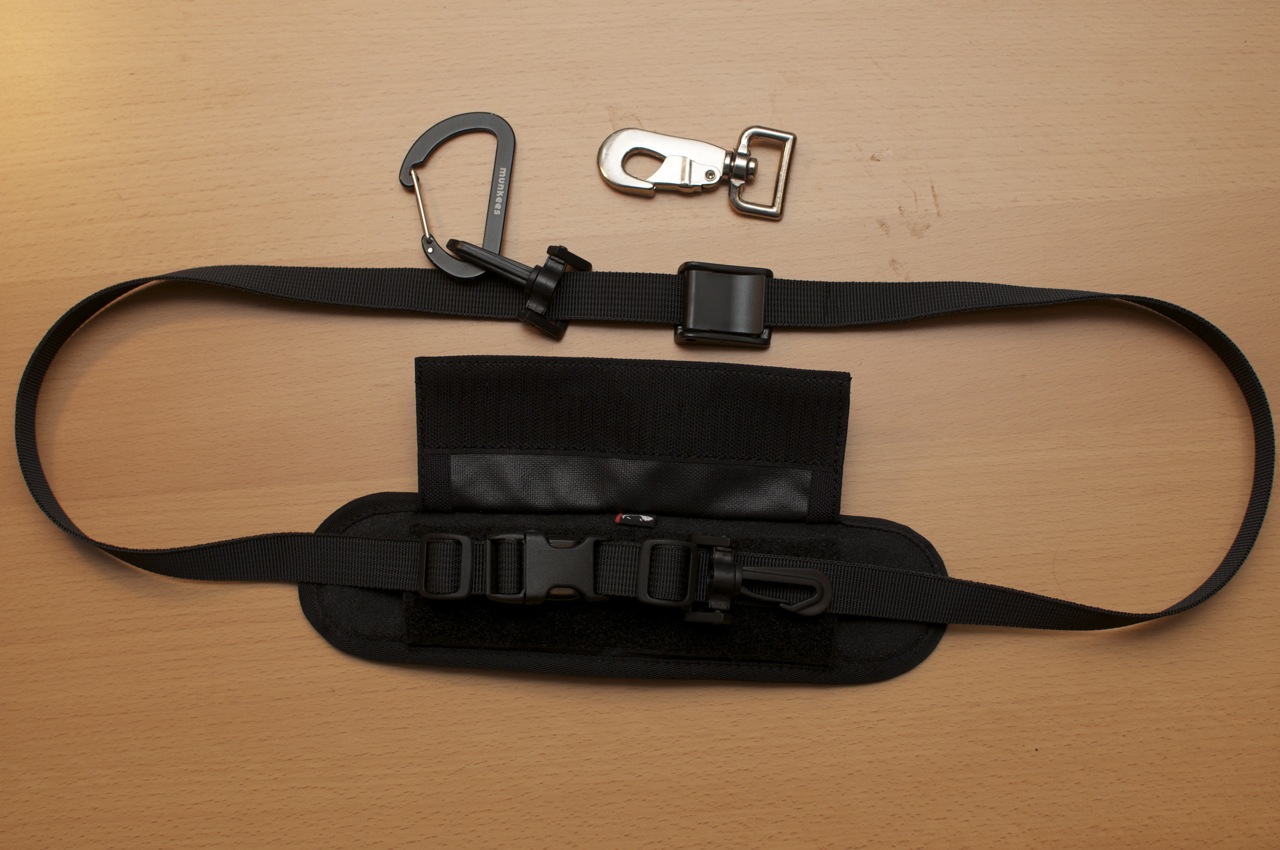
The most difficult part was to find a carabiner that slides on the strap, that I’m also comfortable with attaching a heavy camera to. The plastic ones from an old camera bag looked sturdy enough. They were a little hard to handle though, so I added the aluminum munkees carabiner that is very easy to open and allows me to quickly attach and remove the camera from the strap.
You might wonder why I have two sliding carabiners on the strap (one stays hidden inside the shoulder pad). Well, as you can see in the next picture, I designed my strap so that you can open it, slide the carabiners to the open ends and attach them to the camera again, in the way regular camera straps are used. If you think you don’t need this, you can omit some parts to make the connection inside the shoulder pad simpler.
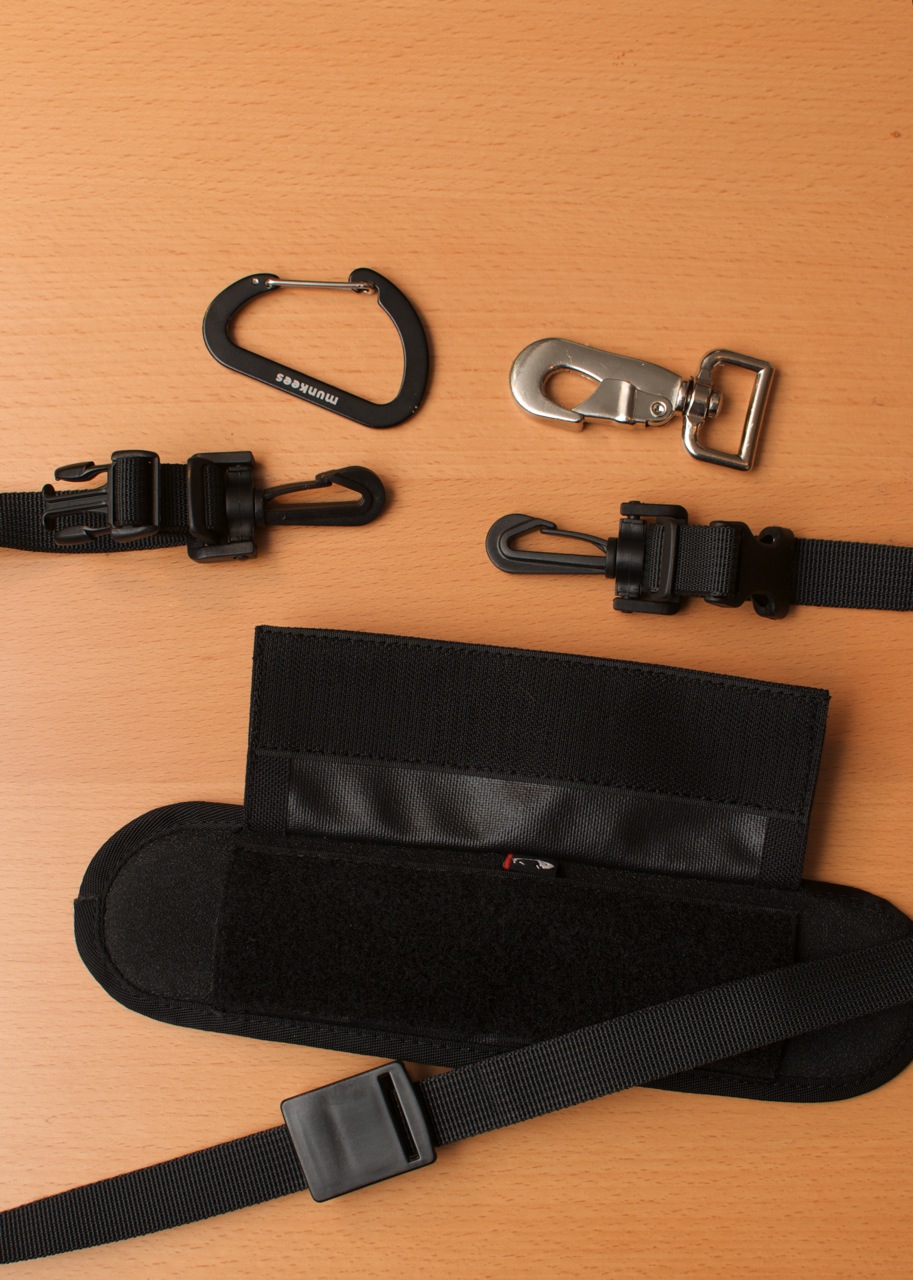
The big, shiny metal carabiner on the upper right is a replacement for the one from the camera bag. I stripped it from a dog leash (for big dogs!, 7€ at Fressnapf). Should I ever carry a 70-200/2.8, I’ll use that one, but for my current, lightweight equipment I prefer the plastic parts because they’re easier to open and weigh less.
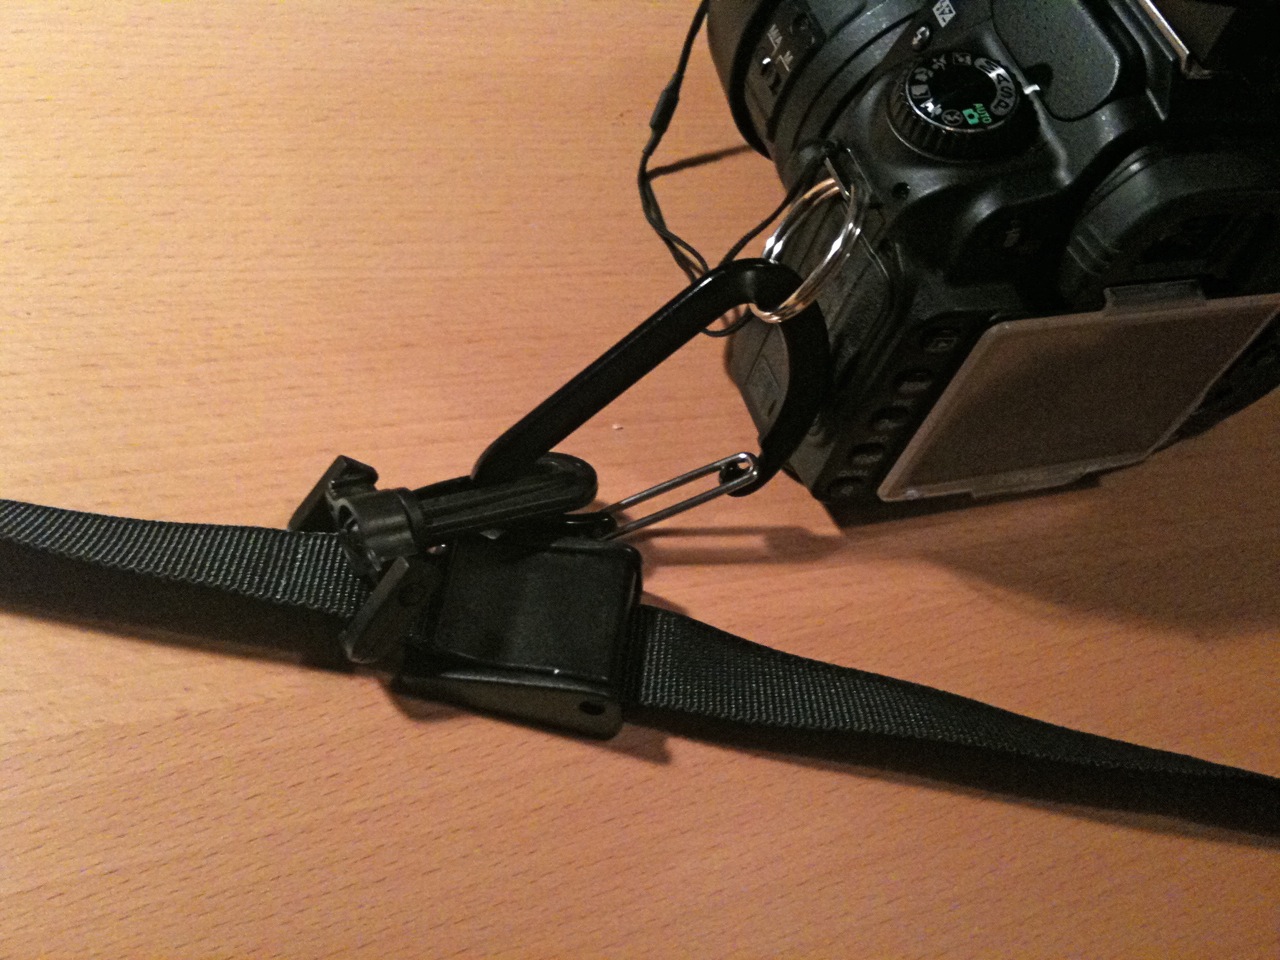
The last image shows how the strap is attached to my D90. I don’t trust the tripod mount and finding a matching screw is difficult as well. A simpler and better way to attach the camera to the strap is to use the dedicated strap eyes on the camera body. To be able to attach the carabiner and to make the system a bit more flexible, I added a simple key ring that remains on the camera.
Update:
I got back to the hardware store and bought some 25mm strap. The result is much sturdier and cleaner that the previous version, but lacks the ability to attach the camera in an old-fashioned way.